Assign a Roleplay activity to your learners to help them practice real-world scenarios in a controlled, feedback-based setting. You can assign it to one or more groups or keep it open for anyone to join using a shareable code or link.
To learn how to create a Roleplay activity, read this article: Create a Roleplay Activity
Follow the steps below to learn how to assign a Roleplay activity as a session:
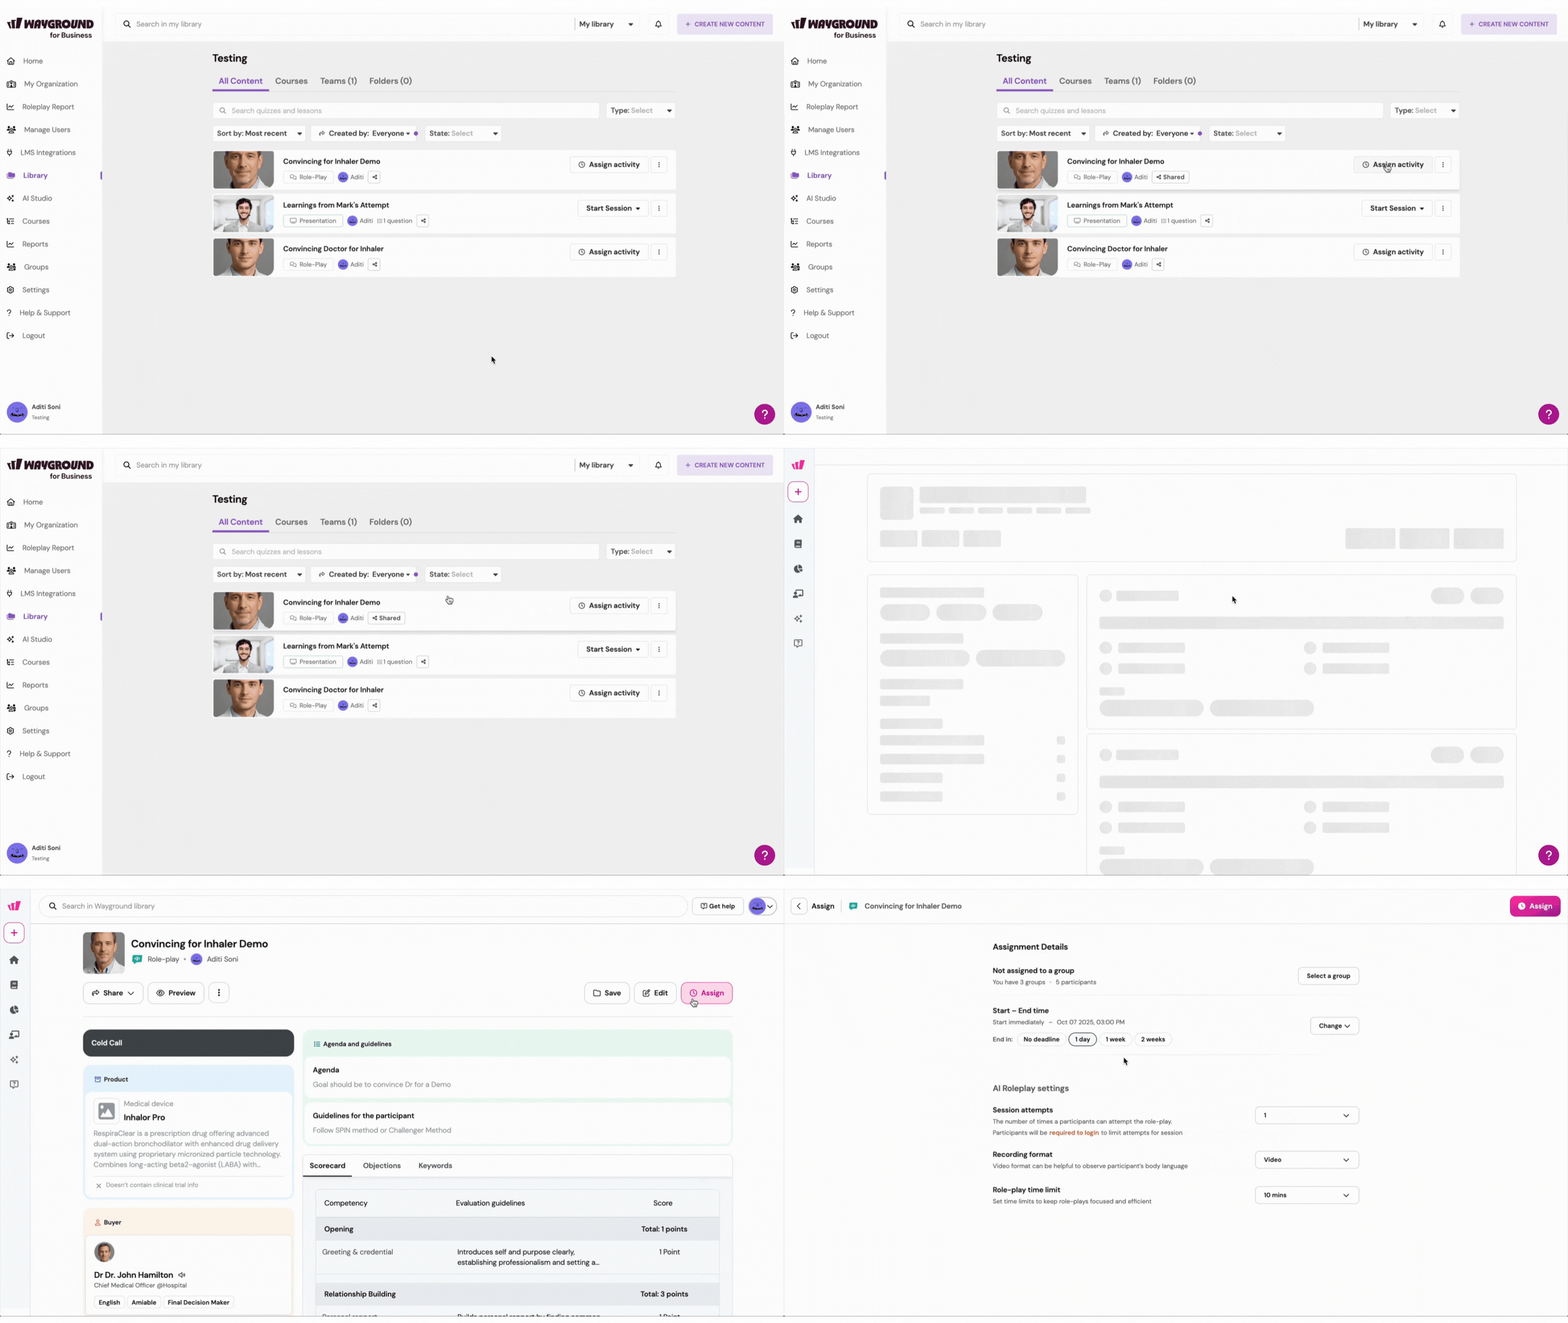
- Select the Roleplay activity you want to assign
- Click on the 'Assign' button on the activity details page

- Now, customize the session settings:
- Assign to a group setting (Recommended)
- 1. Click on the 'Select a group' button to assign the Roleplay activity to one or more groups
- Alternatively, click Pick Specific Participants to assign the activity to select members of that group
- Optionally, give the assignment a title and description

- If someone not part of the assigned group tries to access the activity, they won’t be able to attempt it unless added to the group. Learn how to create a group, and how participants can join a group
- 2. Or, leave the assignment open if you’d like anyone to participate
- You only need to share the join code, the join link, or the QR code
- Participants will need to sign up first before attempting the session
- 1. Click on the 'Select a group' button to assign the Roleplay activity to one or more groups
- Start–End Time setting
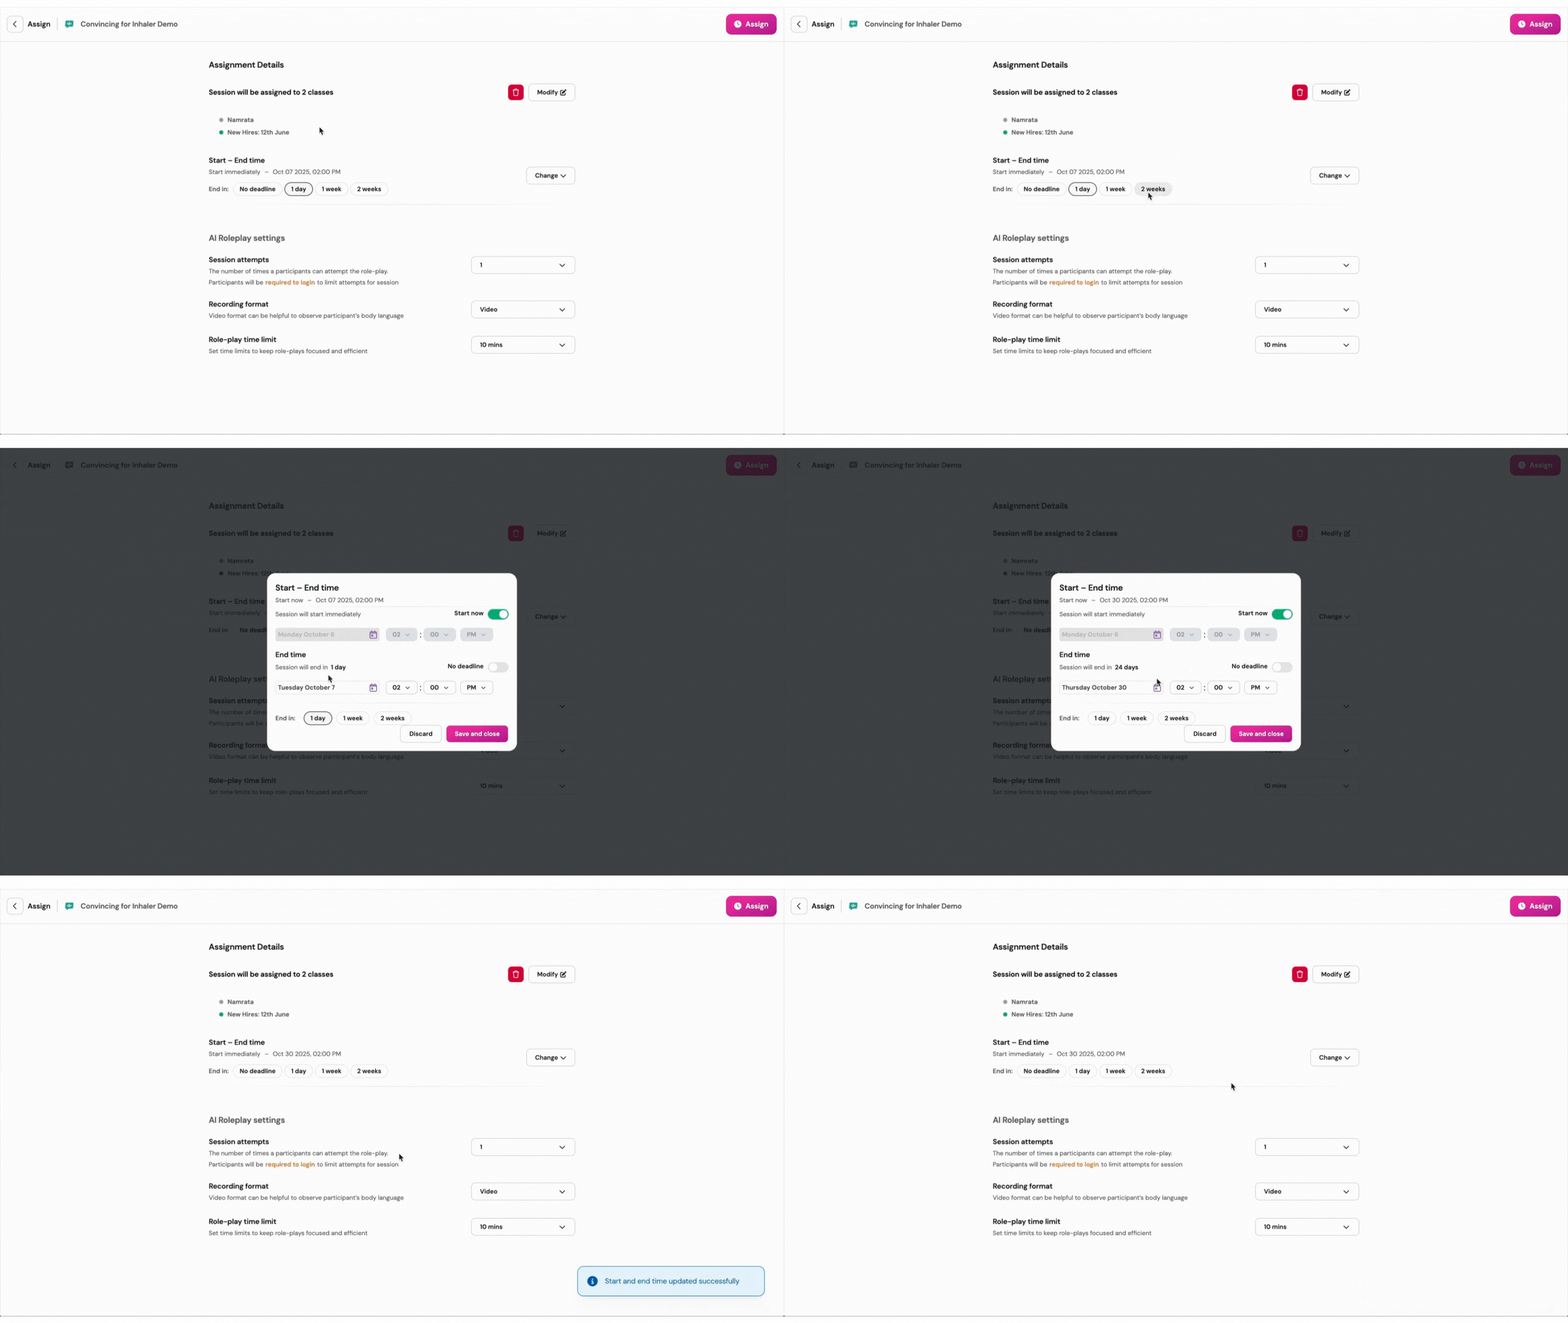
- 1. In this setting, you can specify the start and end date and time for the session. You can schedule the session up to 30 days in advance
- 2. Click on the 'Change' button next to the 'Start–End Time' option
- 3. Set a start time by choosing the required start date and time. If you want the session to start right away, toggle on the 'Start now' option
- 4. Set a deadline by choosing your preferred date and time. If you prefer not to set a deadline, toggle on the 'No deadline' option
- 5. Click on 'Save and close'

- Session attempts setting
- 1. Choose how many times participants can attempt the Roleplay session: 1, 2, 3, 4, or 5 times
- 2. Make sure participants are logged in to Wayground to attempt the session

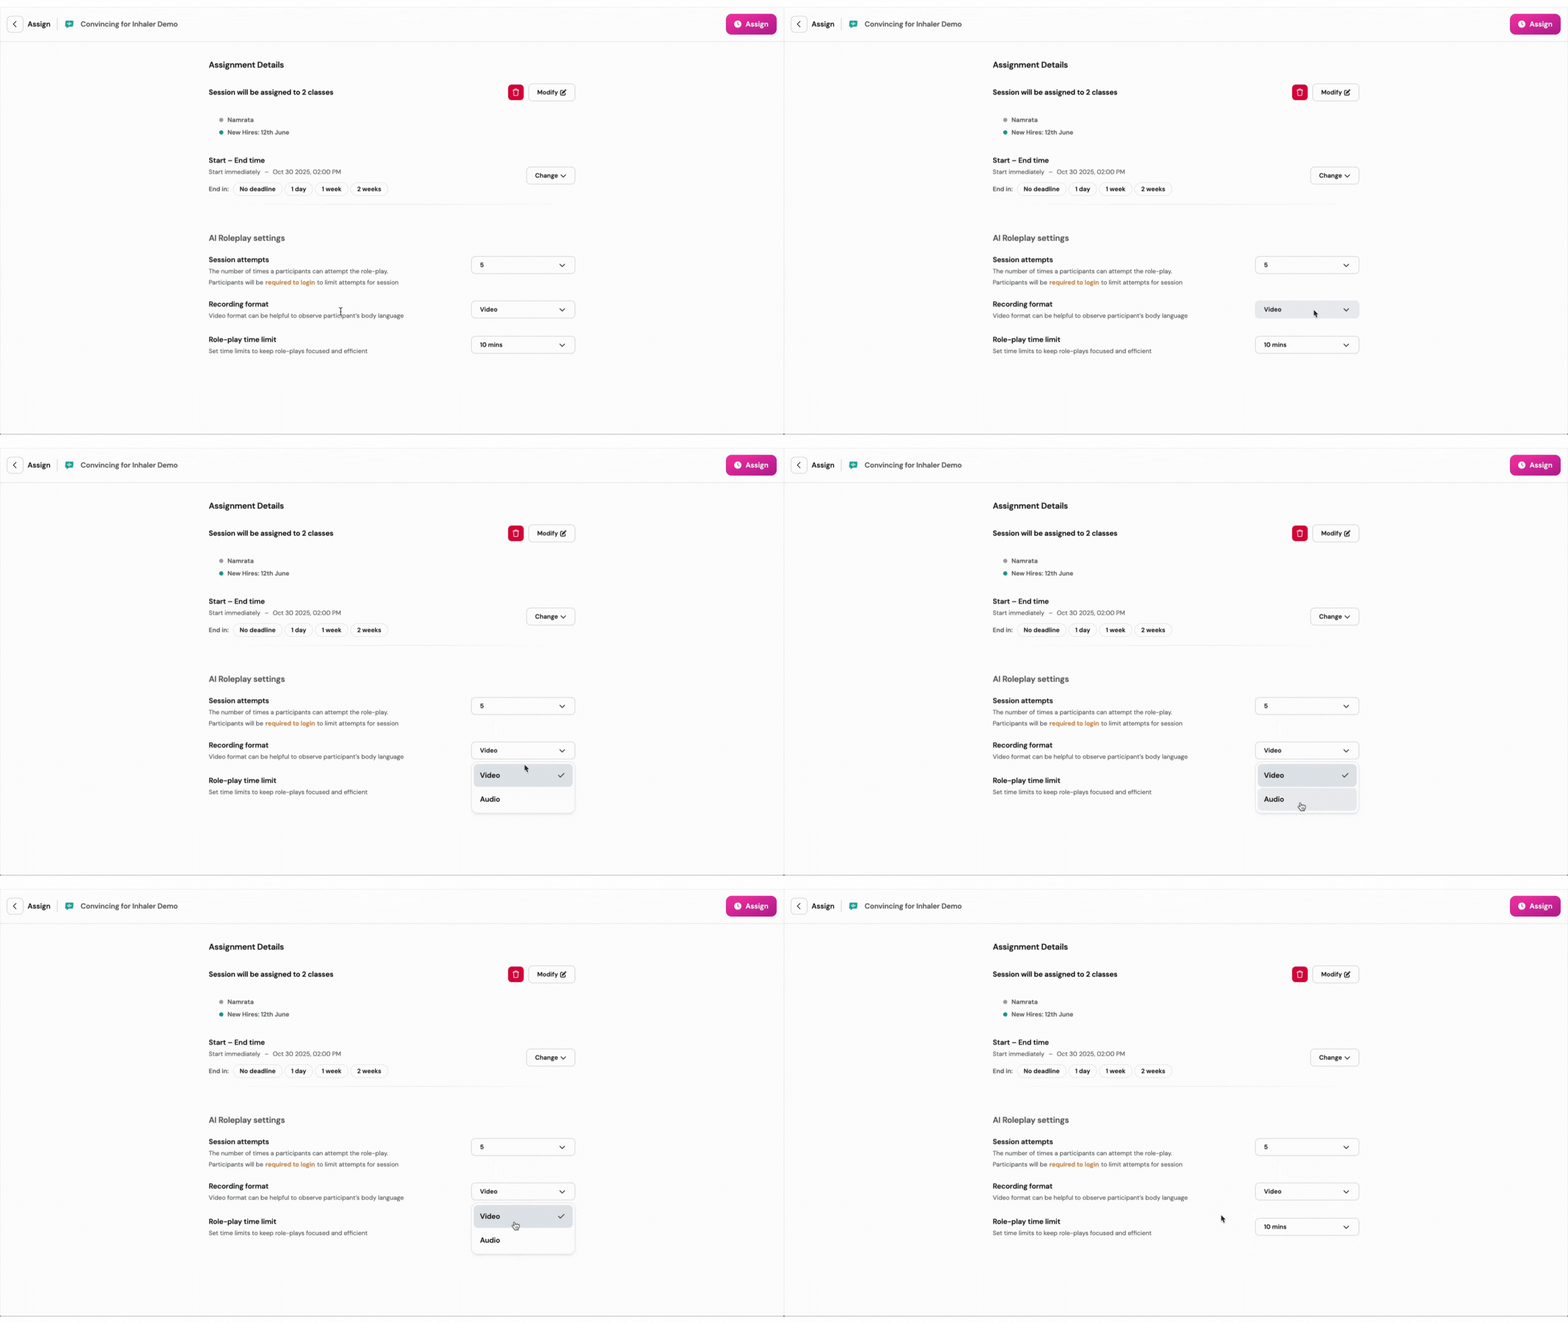
- Recording format setting
- 1. Choose between Video or Audio format
- 2. The video option can help you observe and assess participants’ body language during the Roleplay

- Roleplay time limit setting
- Set a time limit to keep Roleplays focused and efficient
- Choose between 1, 5, 10, 15, 20, or 25 minutes

4. Once you're happy, click on the 'Assign' button
You will now be led to the Report for your assigned Roleplay. If you assigned the activity to groups, they will automatically receive a link to join the session. If not, simply share the join link, join code, or QR code with your participants.
Once they complete the Roleplay session, you can view their performance on the reports page. Read more about it here: Viewing Roleplay Performance & More in Reports
Learn more
To learn how to create a Roleplay activity, read this article: Create a Roleplay Activity
To learn about Roleplay performance insights and reporting, read this article: Viewing Roleplay Performance & More in Reports
To learn about Roleplays on Wayground for Business, read this article: Roleplays on Wayground for Business: Overview & Best Practices
Was this article helpful?
That’s Great!
Thank you for your feedback
Sorry! We couldn't be helpful
Thank you for your feedback
Feedback sent
We appreciate your effort and will try to fix the article